For enabling 2fa for single user.
1. Log in to the Admin Panel.
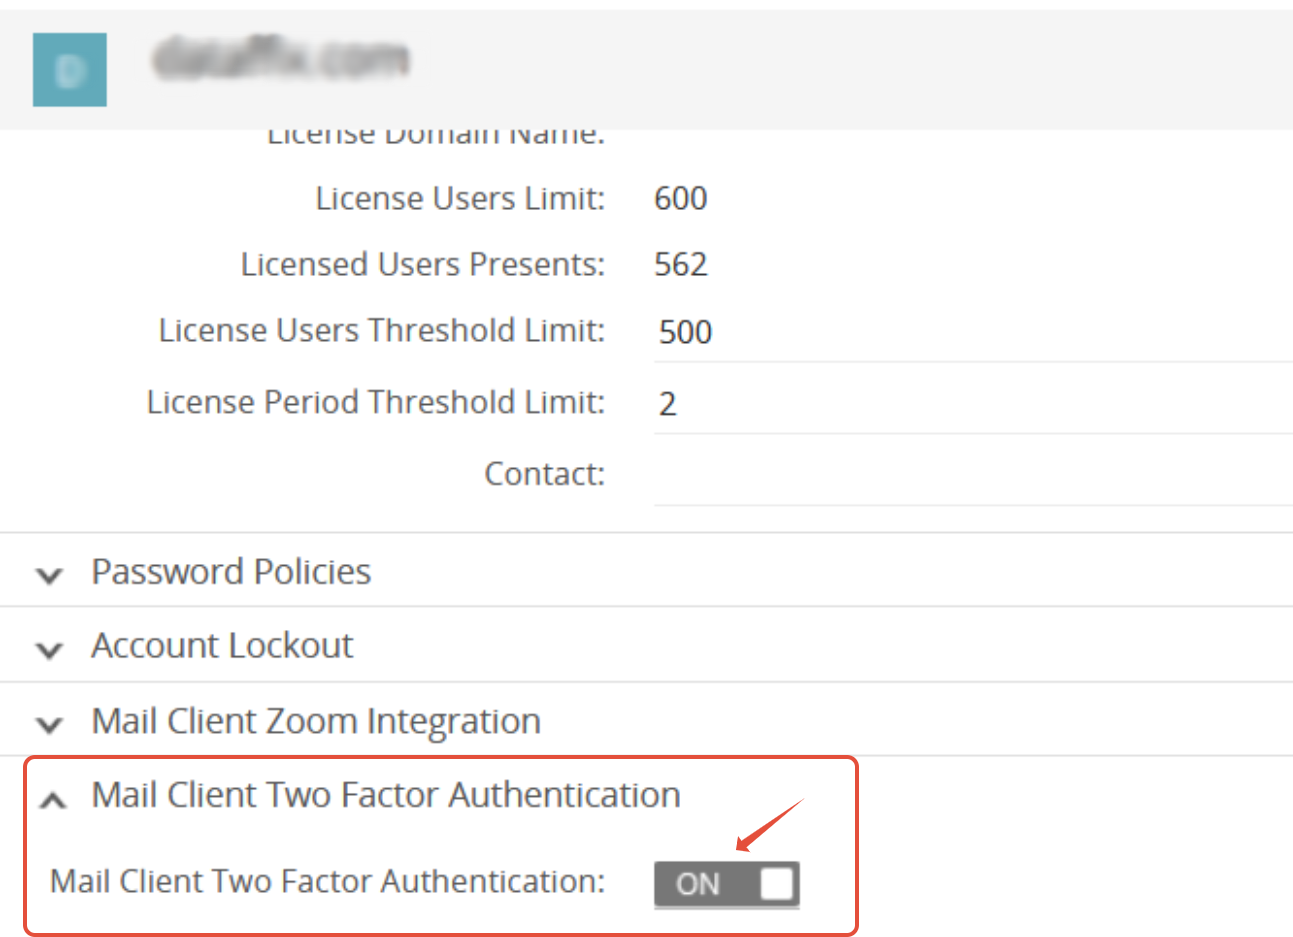
2. Enable domain-level 2FA:
- Go to Mail Client Two Factor Authentication settings.
- Enable this option at the domain level.
3. Select the user for whom you want to enable Two Factor Authentication.
4. Enable user-level 2FA:
- Click on Mail Client Two Factor Authentication and enable the option for the selected user.
- Note: Ensure this option is disabled for all other users to avoid affecting them.

5. Ask the user to log in to Webmail.
6. On the login page, the user should:
- Enter Username, Password, and Captcha.
- Click on Login.
7. Upon successful login, the user will be redirected to the 2FA enrollment screen.
8. Click on Register 2FA.
9. A QR Code will be displayed.
10. Launch the Google Authenticator app on the mobile device.
11. Scan the QR code using the app.
- A new entry labeled “Baya2FA <web client URL>” will appear in the app.
- A 6-digit verification code will be generated.
12. Enter the code into the input box next to the Check Code button on the web client.
13. Click on Check Code.
14. After successful validation, a confirmation pop-up will appear.
15. Follow the instructions in the pop-up and click Save to complete enrollment.
You can refer below link also-
Enabling 2FA for All Users (Bulk Update)
To enable 2FA for multiple users at once, follow the steps below:
- Prepare a CSV file using the sample format (e.g.,
2fa_sample_csv.csv).- You can enable 2FA for 50–100 users at a time using this file.
- Keep the "classofservice" field blank for all users.
- Log in to the Admin Panel.
- Click on the Import option.

- Uncheck the Add New User from CSV option.

- Select the prepared CSV file.
- Click Continue to start the import and update process.
Once the import is complete, notify users to log in to Webmail and follow the 2FA enrollment steps outlined above.